Sunday, August 13, 2006

Good Motorcycle Roads in West Tennessee - updated 8/8/07


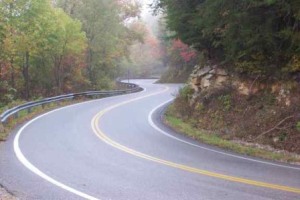
In Tennessee, we’re blessed that our state superbly maintains its smaller state highways and backroads. You really have to get onto a small county road in Tennessee to find a marginally maintained road. Although the state seems to be working inexorably to straighten every one of them, some of the winding backroads that give Tennessee its character still remain. In east Tennessee, some of those roads have gained much deserved fame – 129 (Deal’s Gap), the Blue Ridge Parkway, or the Cherohola Skyway. West Tennessee can’t claim roads with the drama or the vistas of those roads. However, if you’re a restless bike rider with a soft spot for curved asphalt, West Tennessee has some roads you should get to know.

I want to share some of the wonderful roads I’ve found and ridden frequently in West Tennessee. They’ll be identified by their state highway number and, sometimes, a nearby town. You’ll still need a good map to find some of them. I’ve tried to provide some simple potential hazards to look out for. I sometimes start with a chauvinistic description that compares them to a fictitious female stereotype. That’s intended in good humor and to impart a sense of the personality I think the road has. If you don’t like such devices, just skip the first sentence and don’t throw a fit.

I have 3 preachy things first:
  1. I don’t encourage you to exceed any posted speed limits. Any comments about speed limits or traffic cops are simply my opinions for me and my riding habits. Don’t ride like me. I have a defective sense of mortality. If you do speed and you get caught, stop and face the music. The police officers are just doing their job and don’t deserve to die trying to catch you before you kill yourself or someone else. (If you caught the reference about me running from a sheriff in another post, then just so I don't sound hypocritical, I didn't know he was a sheriff.) You know you’re breaking the law, so once caught, pay your fun tax and call it even. If you’re really stupid like me, go to the race track. It’s more fun and much, much safer. Last, I mean no disrespect to any policemen. I’ve ridden with many of them, and to a man, they’re good guys and highly recommended riding partners.
  2. Treat the locals with respect. If you piss them off, they’ll call the local sheriff or the highway patrol and you’ll have ruined a good thing for yourself and everyone else. That’s not just with respect to your riding behavior. If you like loud pipes (and what rider doesn’t?), then keep in them in mind whenever you’re close to homes. You and I might want a home beside a race track, but, believe it or not, most people don’t.
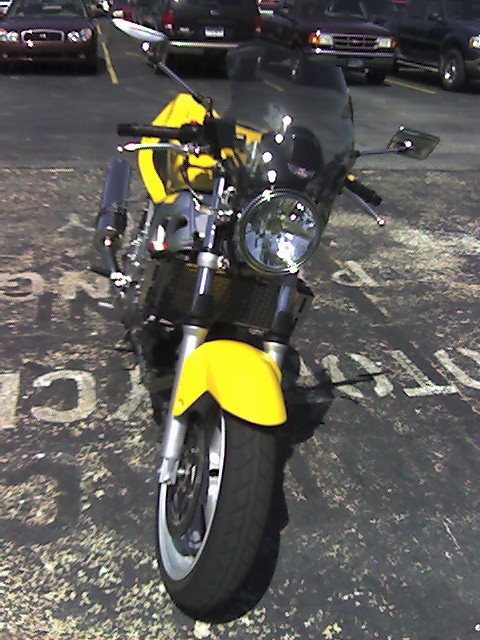
  3. If you ride, wear the best gear you can get - helmet, gloves, riding suit (leather is best), boots, back protector, etc. I'm alive today because Arai makes the best helmet you can put your head inside. I can still walk because a plated back protector can provide just the margin you need to beat the harsh realities of Newtonian physics. I still have all my skin because Vanson Leathers puts stitches to the most beautiful and tough cow skin you can wrap around your tender epidermis. If you don't have the money or the sense to wear some gear, get a go-cart and stay in your driveway.
Now, the roads:

128 (Savannah-Clifton-Linden)
A bombshell that starts off mild, but will bite you when she finally gets you alone.
Old 128 is left just past a Shell station if you're headed east through Savannah. The new name is Clifton Road (actually, this has changed, but I didn't catch the new name). Go north out of Savannah on old 128. It begins as a very nice smooth road full of good sweepers and pretty scenery. The speed limit is a completely ludicrous 45 mph. The fact that this is no longer a state highway is a blessing - little traffic, no cops.
You'll eventually intersect the new and boring 128 less than 10 miles from Clifton. New 128 is an unimaginative, flat road that starts east of Savannah. (I don't know the exact mileage). Slow down in Clifton - you will almost always see a cop trolling for revenue.

128 north from Clifton is much better than the section to the south. A perfect repaving job on the northern half of the north section makes this a road for serious grins. Light traffic, fantastic curves – it’s a delight. Just as a side note, it's also a road for serious hurt if you get carried away. Watch for gravel where small side roads intersect 128. Some lead to gravel pits nearby and that is a bad thing. I was painfully reminded of that hazard when I low-sided my CBR954RR into a tree at about 70 mph. A particularly good loop is the triangle formed by 128-13-228.

There are a few good side roads off of 128 that you’ll see along the way. Explore them, but carefully, they’re smaller and less well maintained and that’s where the houses are located. T-boning a minivan leaving a driveway will screw up your riding plans for the day.

228 (Clifton)
Girl-next-door sister to 128.
Just on the north end of Clifton, turn right at the sign. The pavement is good, but watch out for a few broken patches. I've not noticed any problems in critical areas. Blind turns abound. One right-hander in particular will sucker you when headed back toward Clifton. Because the trees practically cover the road, fallen leaves can be a problem in late summer and fall.

13 between 228 and 128 (Bisects TN)
Homecoming queen with lots of big protective brothers. She’s fun if you can get her alone.
At the end of 228 turn left on 13 and hang on. It starts out calmly but has some curves built for lean angles. For the next few miles, it's sweet, particularly the section between 48 and 128. Highway patrol is frequently spotted on this road, especially in this section. 13 is a generally good road for laid-back touring from 64, north all the way past I-40. You'll see flocks of Harley's and Goldwings on 13.

48 and 230 (South of I-40, north of Centerville)
Very naughty, very sexy, very dangerous roommates.
I almost left these two off the list. They’re too good and too close to I-40. If you ride one, you ride the other. They’re joined at their sexy hips. Just be careful or you’ll be sorry. 48 is the sick one. Probably because of their proximity to I-40, I have seen the occasional trooper on them. Update: 48's bridges are under construction as of the end of July.

104 (Lexington to Milan or Lexington to Reagan)
A wild girl turned mom, sweet curves, but not racy anymore.
Way too popular with local bikers on the weekend - citations are common. It’s best on a weekday when traffic is light. Was once great, but now too many houses along the road with the expected gravel and slow car traffic. A county sheriff lives on the road. What a shame. Take it easy.

438 (North of Linden - east from 13)
Farmer’s daughter. Cleans up real nice.
Fun, but can be unexpectedly hazardous. Apparently, Mennonites live in the valley. Beware of horse crap on the road. There is actually enough to be a hazard. This is turn-around-and-do-it-again road when conditions are good. Little sections with great side-to-side transitions are very entertaining.

232 (South of Land Between the Lakes)
The nymphomaniac gymnast gone bad.
South off 79E from Paris Landing, it was an absolute giggle-fest of a road. However, now it's not. A couple of marina's were built out on some side roads and now the traffic on the road is too heavy - both in terms of congestion and weight. The pavement is in poor condition. Several areas where shadows hide broken spots and pot-holes are truly dangerous. Gravel from cross road used to be non-existent, now it's plentiful. Watch out for pickup trucks towing boats on the wrong side of the road. Usually several bikes will be there on the weekend, but it’s not crowded. Saw a sheriff there the last time I was there, but he was talking to the riders and not acting like a tax collector - that's an increasingly rare thing now.


That’s it for now. If you know of others, please comment below. Once I ride them and find them worthy, I’ll add them.


Saturday, August 05, 2006

Just sharing some of the beauty I've found

I've been too busy to add to my blog recently - buying & moving into a new home, work, travel, dad, chauffer and that pesky, unproductive sleeping habit I keep trying to break. However, in the midst of all that, I met two artists, both specializing in visual arts, that I wanted to share with anyone that stumbles across my blog. It's just a part of the sweet, serendipitous mystery of life that I crossed paths with them.

Links to their websites:

Kathy

Luis

My profound thanks to both of them for the beauty they find in and the beauty they add to the world . . .

Saturday, May 27, 2006

My Guide to Making a Perfect Cup of Coffee

This guide will show you how to make one perfect cup of coffee. There are other ways, but this one will get you one great cup of real coffee in just a little more time than you’d spend making instant “coffee” and it has the added benefit of being relatively inexpensive. That’s good, because you may find yourself addicted to great coffee. It can happen. Starbucks has proven that you can even get people addicted to awful coffee.

Good coffee isn’t bitter. You may be conditioned to equate bitter with strong. If you make it right, you'll start noticing the cascade of subtle flavors that you've never noticed before. That’s why I made this guide.

It is important to understand why little details count. Bear with me for a short lesson in the basics of how coffee beans become a cup of coffee.

The Beans

Coffee beans grow in many parts of the world, but two basic types of beans exist - Arabica and Robusta. Forget Robusta unless you just want caffeine and don't own tastebuds. Arabica is the good stuff. Still, not all Arabica is equal. Like many things, if you want the best, you get the original. That means you get Arabica beans from Ethiopia or Kenya. That’s where coffee began. Other truly great, perhaps even better, beans are out there, but start with Kenya and you’ll know why the world got hooked on coffee from the beginning. There is no substitute for good, fresh Arabica beans. They say it well at http://www.coffeefool.com/:

99% of coffee out there is stale. The good news is that stale coffee is drinkable if you have never truly had fresh coffee. The bad news is that once you have tasted truly fresh coffee, you'll be forever hooked. It will make you giddy every time you go to make a pot. Tingle right down to your toes. Reverberate around your head like a funky aura. That's because coffee, just a few days out of the roaster, is nature's most flavorful drink - more complex than even wine - containing well over 900 flavor compounds to dance on your taste buds. But after a mere ten days, you would be lucky to see half that number. Go out one month and you are skating around 10% of coffees original high.

Some of my favorite beans are: Kenya AA (as I mentioned before), Hawaiian Kona (expensive, but fabulous), Costa Rican Terrazu, and Nicaraguan Antiqua. I’m not really a connoisseur; I just know what I like. I prefer an American or Vienna roast.

The Water

Coffee is made by extraction. Hot water is used to extract the flavor-bearing components from the ground coffee beans. Of course, along with the flavor comes the real vitamin C – caffeine, but that’s just proof that there really is a God.

Back to the science. There are two important things about the water, both are easy:

First, it has to be the right temperature – approximately 200°F. Too hot, and it will extract more bitter flavor components. Too cool and it won’t extract enough flavor components. Don’t worry; my method makes the temperature part easy. The reason why too hot is bad? As the water at the right temperature picks up more flavor components, it approaches saturation and is less able to pick up more of them. Hot water can absorb more (and different) flavor components because the saturation limit of water increases with temperature. Think about how hard it is to get sugar to dissolve in iced tea vs. hot tea. (If you're not from the South, I'm sure you have no idea why someone would put sugar in their tea).

The second important thing about the water is the amount. It’s counter-intuitive, but too much water and you’ll make bitter coffee. Why? Because, remember, brewing is extraction, if you use too much water, you over-extract the bean, similar to using water that was too hot. If you like a weaker cup of coffee, save a little of the water you heat up for the brewing and add it to the finished brew. Too little water? Within a reasonable range, that’s just a waste of beans. The flavor is not really affected, just the yield. That may not make sense if you’re used to Folger’s coffee or such. That’s because you’re used to diluting the brew enough to make the bitterness less noticeable.

A couple more notes about water: Bottled or filtered water is best, but only makes a real difference if your tap water is really hard, soft, or just tastes bad. Avoid distilled water. Why? It’s all about the extraction. Distilled water is hungry water. It has much less dissolved minerals than non-distilled water. Great for your clothes iron, but the lack of dissolved minerals makes the water a stronger solvent. That means it will extract more flavor components from the beans. Just like with over-heated water or too much water, over-extraction means bitter coffee. There is one other important water factor, the time it remains in contact with your coffee beans. More time = more extraction = you guessed it, bitterness. To control the time, the tools are critical.

The Tools – What you need and why

First, you need a grinder. Blade grinders are cheap and easy to find and they will work fine. Some people prefer burr grinders. Blade grinders tend to create grounds of many different sizes - some big chunks, some dust. The problem is, the small, dusty particles will get extracted more than the bigger ones. By now you know what over-extraction causes. Burr grinders create a more consistent particle size. There’s still some variation, but not as much. That helps flavor. You can set the grinder to create smaller or larger particles. Generally, for our purposes, you want grounds that are larger grains than corn meal. Really fine particles, almost like flour, are used for espresso (the extraction time is much shorter for espresso). It’s hard to describe the particle size you need. You’ll have to experiment a little to find the grounds size that works for you. (A tip: If you must use a blade grinder, I’ve found that shaking it while it’s grinding helps create better consistency).

Second, you need a coffee maker. For my method, that’s the easy and cheap part. Drip coffee makers, percolators, etc. make coffee for armies. We’re just making one cup. Those other coffee makers also tend to get the temperature of the water wrong. Percolators tend to get it too hot. Drip coffee makers are all over the map. You’ll be using a one-cup filter holder, the matching #2 filter, and a microwave oven. The microwave can be replaced by a kettle on your stove top, but it takes longer. I recommend the Melitta single cup coffee cone and Melitta natural brown filters. These filters have small holes punched in them. The holes are too small to let grounds through, but they let the water through more quickly than other paper filters. Remember about the importance of the time the water spends with the coffee beans? These filters make smoother, more flavorful, less bitter coffee. Permanent gold filters work great too, but increase your cleanup time.

Other minor tools are needed. See the list at the end of the guide.

Now the steps:

Step 1: Get good beans. I recommend http://www.coffeefool.com/ - fast, freshly roasted, great selection, reasonable prices. If you have a local roaster, that’s a great option. (The next step in my addiction is my own roaster).

Step 2: Put 12 ounces of cold water in a microwave safe cup and bring to a boil.

Step 3: While the water’s heating up, grind the beans to match your taste. You will want 4 tablespoons of unground beans for 12 ounces of water. For the best flavor, grind just what you need just before using it.

Step 4: Put the filter and cone on your coffee cup and dump the ground coffee into it. (Remember, it’s better to have too many grounds than too few).

Step 5: When the water is boiling, take it out. Use a small instant-read thermometer to check the temperature. Because of water’s low specific heat, it’ll cool down fairly quickly. If you’re impatient, like me, you can add a small amount of cold water to speed things up a bit. When the temperature is between 190˚F - 200˚F, pour 12 oz. of water onto the grounds in the cone. If your coffee is fresh, you’ll see a beautiful, light brown foam known as bloom. That’s good. Old coffee doesn’t bloom. At this point, the smell is divine.

Step 6: Wait until the coffee drains out into your coffee cup. Drink up. It’ll be sweet. Don’t add anything.

Step 7: Thank God for such a creation.

Helpful tips:

  • You’ll laugh, but this is really important. To really taste the subtleties in coffee, you need to slurp it a little – get some air mixed up in there. Why’s that? We’ll your tongue really can’t taste much beyond basic bitter, sweet, salty, and spicy. It’s really your nose that tastes the complex flavors. Try it and you’ll see what I mean. So, as you’re enjoying your next cup of great coffee consider the primitive DNA connection we have with the lowly snake that smells with its tongue. Great coffee inspires great thoughts. Of course, you should also consider that extravagant slurping is annoying to everyone around you, so keep it subtle. If you don’t care about looking silly, you should become a wine snob.
  • Don’t freeze your beans. That’s an old wives tale. Freezing affects the porosity of the beans and, as a result, the extraction process is affected. If you want fresh coffee beans, you just have to buy them more frequently. Every addiction has a downside, sorry.
  • Avoid “flavored” coffees. If you like them, it’s probably because you haven’t had really good coffee yet. Those added flavors, many synthetic, overwhelm the subtle natural flavors of the coffee beans. They may mask bitter coffee, but you won’t be making bitter coffee anymore. Interestingly, most of those synthetic flavors are actually just odors. You’re tongue can’t perceive them at all.
  • Here’s a fine detail: If it’s convenient, keep a small spray bottle of water handy. Just before you pour the hot water on the grounds, soak them with the water in the spray bottle. This will keep large clumps of dry grounds from floating to the top as you add the hot water. That means they’ll be where they should be for extraction to occur. If you don’t have the spray bottle, you just have to chase them around a little with the hot water.

Tool list:

  1. Burr grinder - $60 up to whatever you’re willing to spend. Blade grinders are about $15.
  2. 2 tablespoon scoop (1/8 cup)
  3. Melitta Single Cup Coffee Cone - http://www.melitta.com/ (Click on the manual coffee maker link. See CM-0/2 BLACK, PLASTIC FILTER CONE FOR ONE CUP)
  4. Melitta natural brown #2 filters – http://www.melitta.com/ or your local retailer (These filters are important)
  5. A microwave safe cup, like a Pyrex measuring cup or a ceramic creamer. It needs to be big enough to contain water that’s boiling.
  6. A cheap, instant-read thermometer like you use to stick into a roast to check the temperature. These are less than $5 at Walmart. They look like a 6 inch long metal spear with a little dial gauge on the end of it. Mine is made by Baker’s Secret.

Total tool cost: Less than $80 or a month’s supply of Starbucks coffee.

Consider that, including the cost of premium beans and the Melitta filters, it’ll cost you about 25 cents per cup for your superb coffee. At that price you can afford to get your friends addicted. Enjoy.

Monday, May 22, 2006

My 2004 Suzuki SV650 - An Addictive Little Project

I'm posting this just to get some stuff up on my blog:

I'll skip the details on how this bike became mine, but suffice to say, since it's not a hard-core sportbike, it's not one I would have usually purchased. It's a bright, pearl yellow, naked version. I would've never t
hought it would happen, but I fell in love with this fun little bike. However, it wasn't close to my standards in stock form, so I set about modifying. That's been fun. Not as much as riding it, but like a cherry on your ice cream. Anyhow, here's some of what I've done so far:

7/26/08 Update: Recent changes: First, replaced the first GSXR1000 rear shock with another $60 one from ebay because I wore the first one out (the bike has almost 30,000 miles on it now). I will keep this shock until this winter when I will get the Penske unit. Second, I bought a conversion kit to change the front/rear sprocket to a 14/47 combo with a 520 chain. I only bought it to use at Deal's Gap. Acceleration is better due to the shorter gearing, but revs are too high for my typical highway speeds so I replace the stock ratios for normal riding (Vortex front and rear 15/45 with a 525 chain). Third, I had the Power Commander tuned by Ken Wheeler. He's a master and an SV owner himself. He yanked the snorkel off, adjusted the TPS properly (if you own a 2003+ SV, you probably need this done) and did the full range tune. What a difference! More power, especially in the mid-range, and a really beautiful intake honk now. Love it!


I've significantly improved this bike over stock. It's more powerful, better handling, better looking, and more comfortable that a new one. It will outrun your local sheriff. Don't ask me how I know. (And, no, it won’t outrun his radio - again, don't ask me how I know). Seriously, for 23 years, I've owned and ridden (many miles and almost daily) many sport bikes from 350cc to 1000cc. This bike is as much fun (no, not as fast) as any of them and way more practical. It'll do everything but dirt.

Here's some of the icing I've added to Suzuki's original cake:
Motrax bar end mirrors - look just like the CRG mirrors, but cost 1/5th the price. Not shown in photo, but I'll update it soon. Huge functional and cosmetic improvement. Filled handlebar with BB's to make up for losing the bar end weights.
Suburban Machinery Intermediate Handlebar - positions grip lower and farther forward than stock, but not nearly as extreme as a full sport bike crouch. Love it.
Race Tech / Traxxion Dynamics Cartridge Emulator Kit in front forks - makes the old stock forks seem like pogo sticks. The stock suspension is the weakest part of the SV. It's a shame Suzuki doesn't do just a little more to really make the suspension worthy of the rest of the bike. Replace the 64lb valve springs with 48lb to get more compliance for high-speed compression. 3 turns of spring preload on emulators.
Race Tech 0.85 kg fork springs - proper springs for an aggressive 200 lb. rider instead of the 160 lb. moped rider the OEM springs were built for.
2002 Suzuki GSXR-1000 fully adjustable rear shock. Words can’t describe how much better this shock is than the pathetic OEM shock. This took some modification of the battery and tool kit tray. I'm seriously tempted to buy a Penske or Ohlins shock for the rear, but I only paid $60 for the GSXR shock on ebay, so the premium $$ for the rich stuff is hard to justify. Of course, lack of justification is a weak barrier.
Dynojet Power Commander III USB Programmable fuel injection control unit. More power, but more importantly, smoother power at low revs than the snatchy stock bike.
K&N filter - just because the Suzuki paper unit was almost as expensive.
Scorpion Oval Slip-on Exhaust - cheap and sufficient.
Color-matched genuine Suzuki Solo Seat Cowl - I never ride passengers and this combined with the integrated taillight really clean up the rear end. Had to modify it & the bike a little to get the fit I wanted. Stock, it sat up higher than the surrounding bodywork. Ground off the raised lip around where the seat latch assembly screws to the subframe. Carved off 2 mm of the rubber bumpers on the cowl. Used adhesive backed foam under the cowl hook plate to get it to feel solid.
Genuine Suzuki Gel Seat - Not in the photos here. Way better than the stock seat without giving up distance between the seat and pegs the way the Corbin and Sargent dished-out seats do. Gets and stays hot as a skillet in summer though. I have to cover it in the sun or scrambled huevos for sure.
Integrated LED Turn signal-Taillight and front LED turn signals - I added resistors to slow the LED turn signals to stock blinker rate. Looks like the stock bike should have looked, but didn't. I got the integrated taillight replacement new on ebay and it's excellent. The front ones were from Lockhart Phillips. Cheap and easy. The resistors for the taillight came with it. I got the resistors for the front from a Powerbronze dealer at the AMA superbike races at Barber motorsports park. I'm sure they're available elsewhere.
Heated grips - these are pure genius. From a kit I bought on Aerostich's excellent web site.
Titanium muffler bracket - Lockhart Phillips I think.
New EK X-ring gold chain - after I trashed the original one on a 2000 mile trip where every minute was like a monsoon.
Valentine 1 radar detector - Actually this one moves between my vehicles, but I have a H.A.R.D. system from radarbusters.com so I get a heads-up warning in my Arai helmet. I Don't leave home without it. I carry a couple of ziploc bags for the detector heads up unit in case of rain.
There's some other stuff I'm forgetting, I'm sure. The mods happened over the last two years, but they've slowed down some.

Now the pictures. I apologize for the quality. I took them with my Treo. It sucks as a phone and a camera.